Creating a Microsoft Dynamics 365 F&O connector
The Create connector wizard guides you through the configuration when creating a connector. You can only create one Microsoft Dynamics 365 F&O type connector.
Note: Please ensure you've downloaded and installed the Experlogix app for Microsoft Dynamics 365 F&O. For instructions, refer to Installing the Experlogix App for Microsoft Dynamics 365 F&O. If you are not an Administrator role, you can temporarily change your role by checking the checkbox that allows you to apply the Smart Flows Administrator role to the connector user during Microsoft Dynamics 365 F&O connector setup.
The checkbox temporarily have Administrator privilege only displays when the user is creating a Microsoft Dynamics 365 F&O connector and the user does not have the required permissions to create the connector.
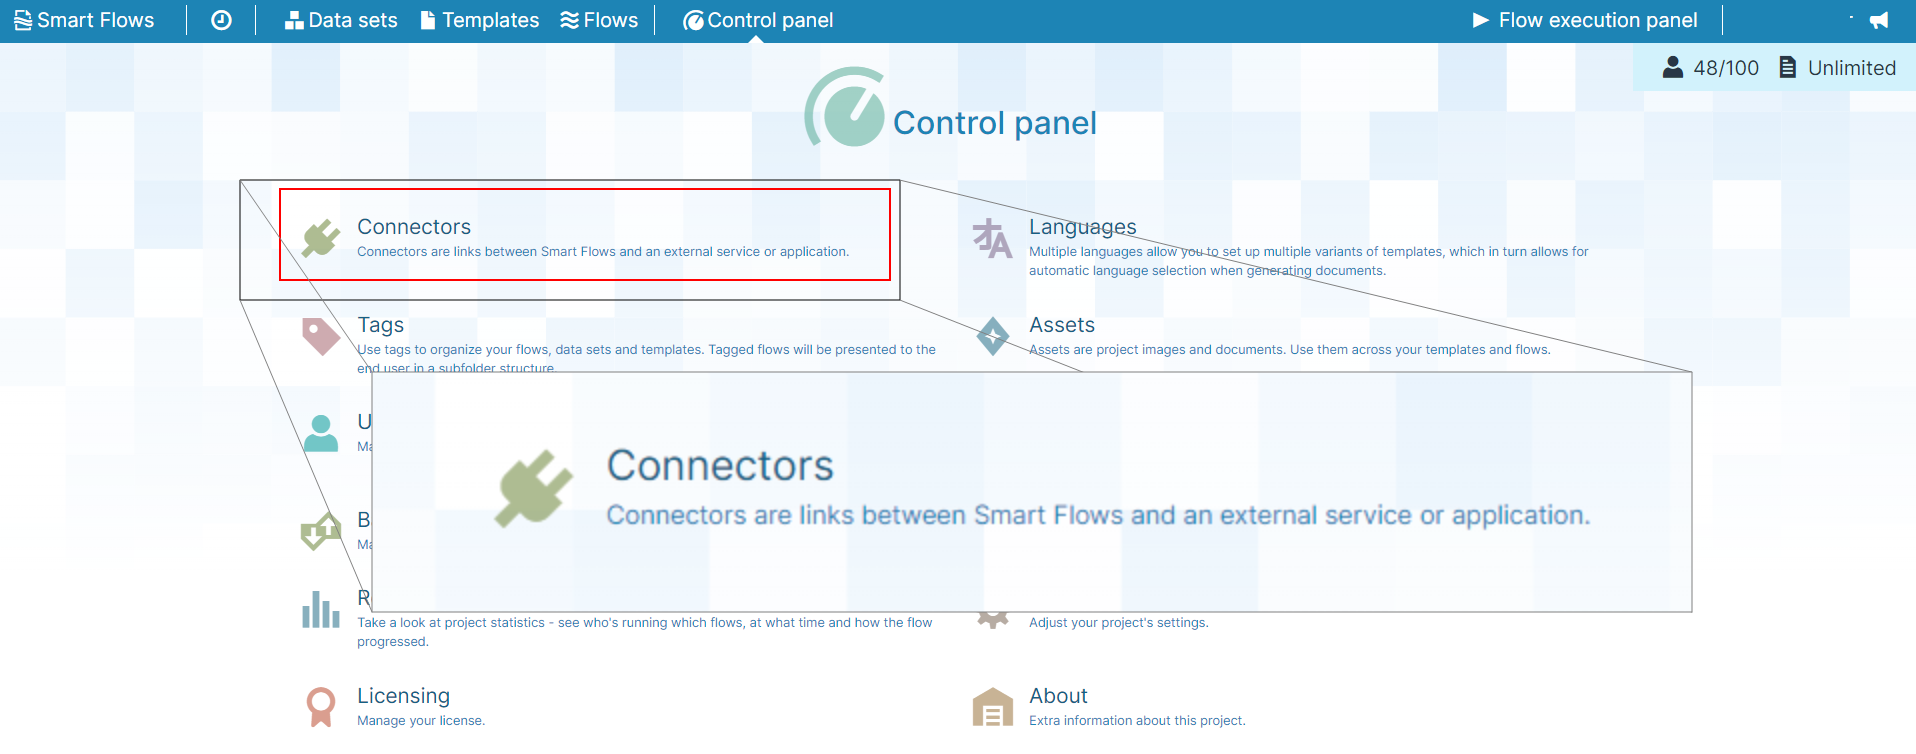
| 1. | In the Project Console's Control panel, select the Connectors button. |
The Connectors list view displays.
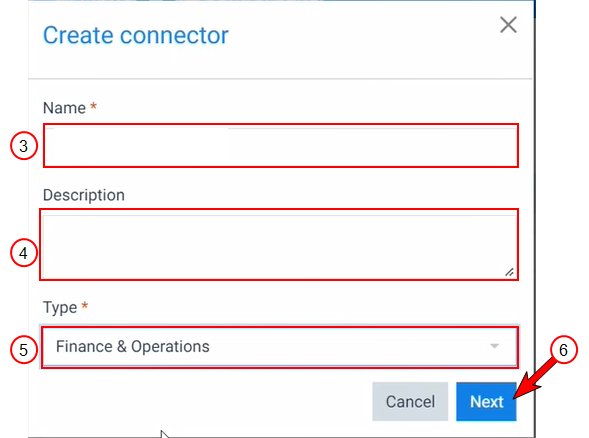
| 2. | Select the +Create button. |
The Create connector wizard displays.

| 3. | Input the name of your connector. |
| 4. | (Optional) Input a Description for your connector. |
| 5. | In the Type dropdown menu, select Finance and Operations. |
| 6. | Select the Next button. |
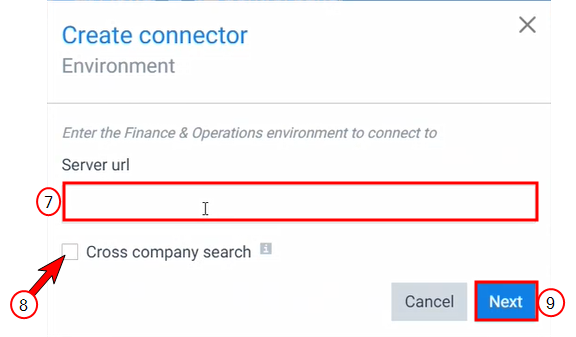
The Create Connector Environment window displays.
Note: The Server URL can be found in the address bar when you are in your Microsoft Dynamics 365 F&O instance.Example: https://companyx.crm4.dynamics.com
| 7. | In the Server url field, copy and paste the URL for your Microsoft Dynamics 365 F&O instance. |
Decision Point
Do you want your users to be able to access data from all of the companies within your Microsoft Dynamics 365 F&O instance that the administrator who created the connector can access? If so select, Cross-company search.
Do you want your users to only have access to the company data they can access by default(mirrors their existing access)? If so, do not select Cross-company search.
| 8. | (Optional) Select the check box next to Cross-company search. |
A checkmark displays in the check box.
| 9. | Select the blue Next button. |
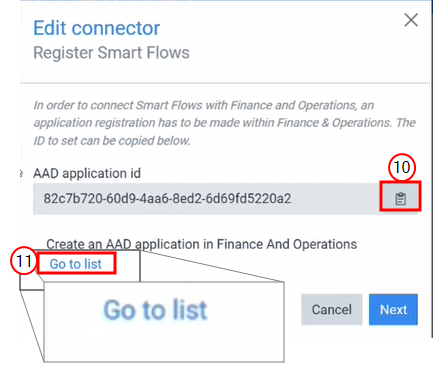
The Register Smart Flows window displays.
| 10. | Select the copy button. |
| 11. | Select the Go to list button. |
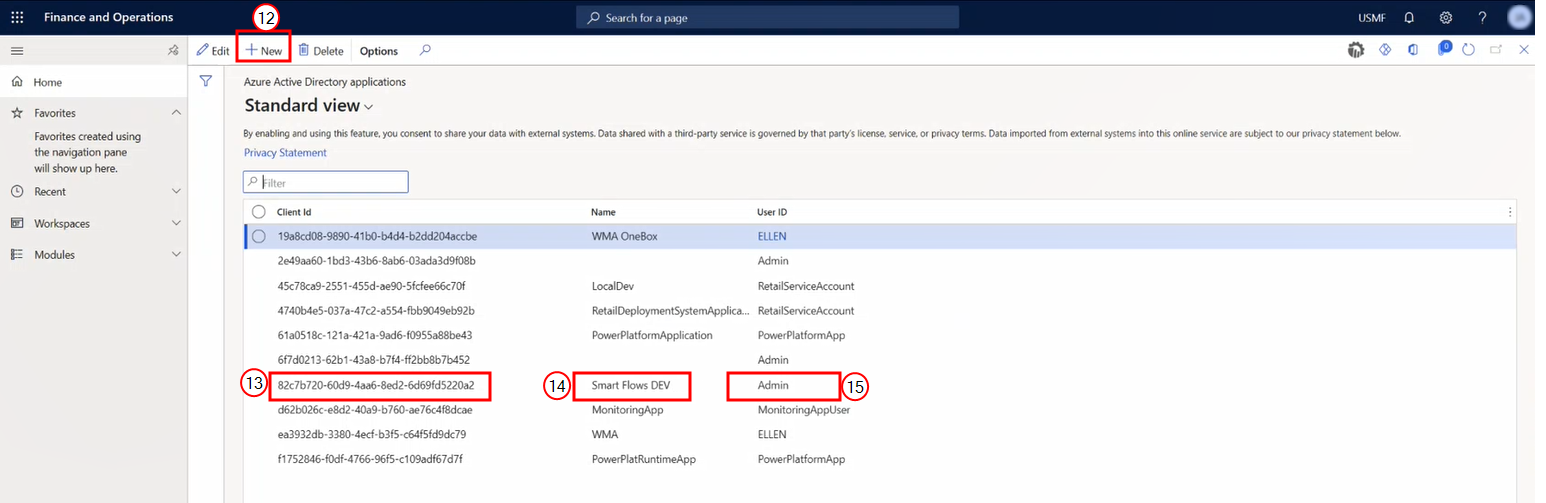
The AAD application list displays in Microsoft Dynamics 365 F&O.
| 12. | Select the +New button. |
| 13. | In Microsoft Dynamics 365 F&O, in the Client ID column, paste the AAD application id for Smart Flows. |
| 14. | In the Name column, input the name for your Smart Flows connector |
| 15. | In the User ID column, select Admin. |
| 16. | Select the save button. |
The new row displays in the Microsoft Dynamics 365 F&O AAD application id list view.
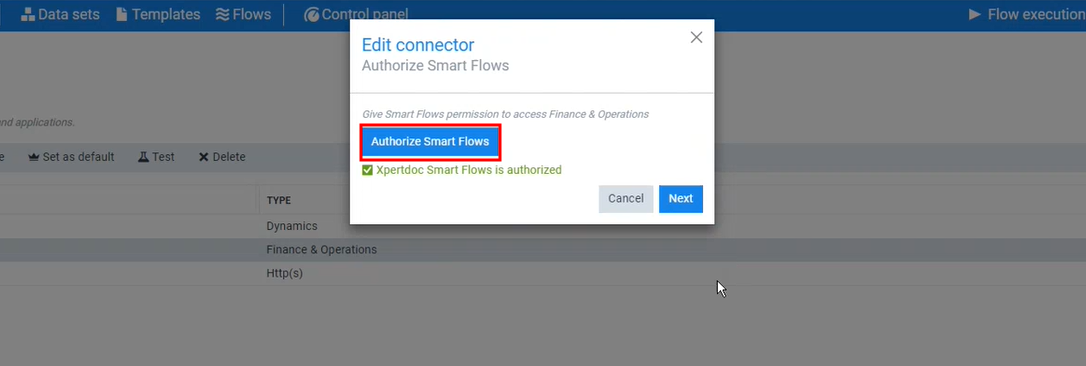
| 17. | Select the Authorize Smart Flows button. |
The credential manager displays.
| 18. | Log in with your Microsoft Dynamics 365 F&O credentials. |
The Microsoft Dynamics 365 F&O configuration records display.
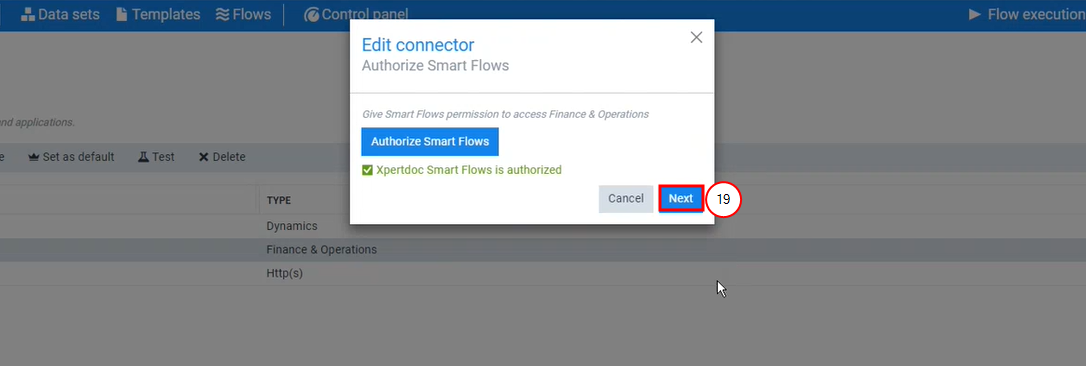
| 19. | Select the blue Next button. |
The Edit Connector Authorize Smart Flows window displays.
If you want to review your configuration record in Microsoft Dynamics 365 F&O please continue to STEP 20. Creating a connector.
If you wish to authorize Smart Flows without reviewing your configuration record in Smart Flows please skip to STEP 22. Creating a connector.
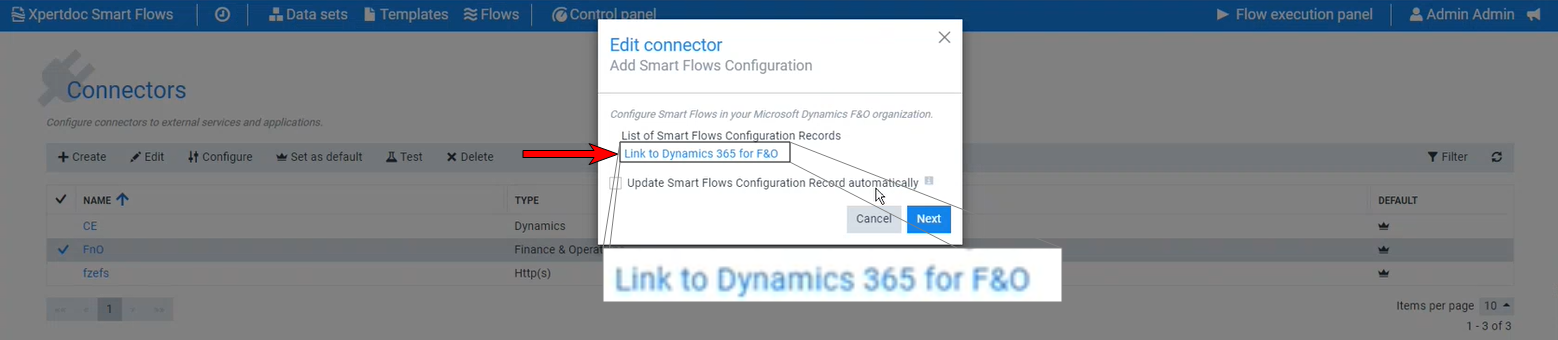
The two steps below can be used if you wish to manually review the configuration record. However, the system can automatically update the config record for you.
| 20. | (Optional) Select the Link to Dynamics 365 for F&O. |
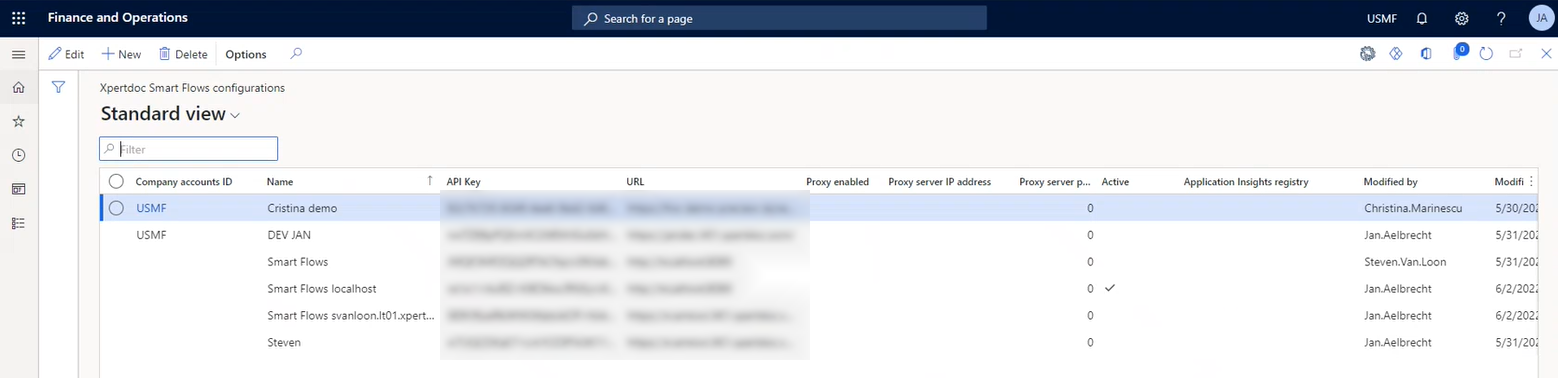
The Microsoft Dynamics 365 F&O configuration records display.
There should only be one active configuration at a given time.
| 21. | (Optional) Review your configuration record. |
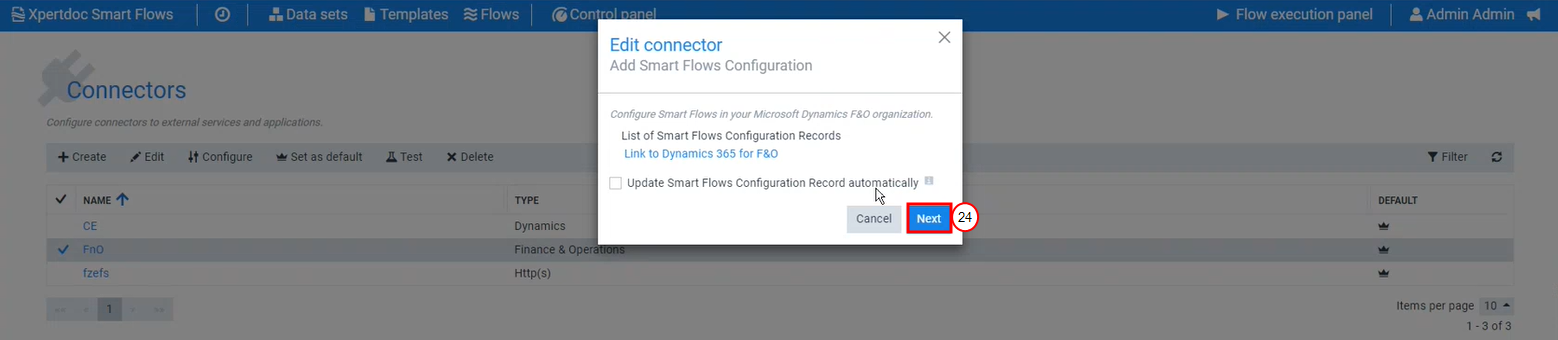
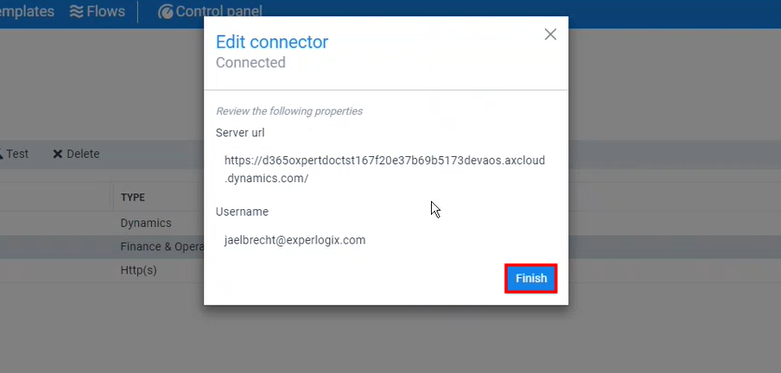
| 23. | Select the blue Finish button. |
The Basic setting page displays.
You have successfully creation and configuration of your Microsoft Dynamics 365 F&O connector.